Divinity: Original Sin 2 is an RPG set in Rivellon, hundreds of years after the original game. It’s brought to the world by Larian Studios who have been lovingly augmenting the original release, years since it’s release. There’s been plenty of free content packs, supported mods, and other little gifted bits and pieces from the studio. These have all been compiled into a Definitive Edition, which is now available on just about every platform that you can think of.
Today we’re going to look at a very specific build, one that revolves around explosions. They say cool people don’t look at explosions, and that may well be true, but they sure as hell make them. That’s what we’re going to do with this Divinity build, explode things. By combining choice elements of Geomancy and Pyromancy, we can craft a fire mage build that will rattle ribs from Fort Joy to Arx. This is MGN’s Fire Mage Build for Divinity: Orginal Sin 2.
Step One – Becoming Toxic
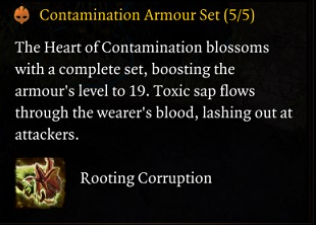
The first step in becoming a master-exploder is finishing the Seed of Power quest-line so that you can obtain the Contamination Armour Set. This technically can be completed at any point before ‘the point of no return’ at the end of the game, but the pieces can be picked up along the way of your playthrough. The point I’m making about the quest line being available up until the very end of the game, is to let you know that you wont miss out on this set if you haven’t completed specific events leading up to the final chapter. If you’re in Arx, but want to explode stuff, fear not, because you haven’t missed out.
Whilst I’m going to begin the guide for obtaining the set at Fort Joy, you can really pick it up anywhere along the way. The first opportunity to progress the Seed of Power quest line is straight of the boat in Fort Joy. Alongside the turtle beach there is another wrecked ship, with an elf fighting off a group of magisters. The coordinates for the boat are Regardless of the outcome of this fight, you can still progress the quest. If you kill everyone including the elf, you’ll get the Greaves and Boots of the set.
If you haven’t killed the elf, you can run into her again in reapers coast at: X: 437, Y: 319. She’ll give you a bit of a lore dump on how she makes the armor, and tell you to follow up at the Black Pits. If she’s already dead, you can cast the spore ability on the magister nearby, or murder one of your companions and create the gauntlets that way. If you don’t have the spore ability, head to the black pits spore node to learn it – it’s at X: 716, Y: 164.
Or, if she’s still alive, you can ignore her lore dump and just murder her after she’s yapped on about the armor, and you’ll get all the pieces that she’s made thus far. This is the route I usually go, as it’s the most hilarious. You’ll then have three pieces from her corpse.
With that completed, we’re once again going to the spore area in the Black Pits for the chest piece, and gauntlets if you’re yet to make them. The magister at X: 742, Y: 181 will have the chest piece, and you can obtain it from them however you wish. If you killed the elf at the start and need the gaunlets, there will be a second magister, cast the spore ability on the second to get the gauntlets here.
That’s just about all the pieces that you can obtain until Arx, and when you arrive you’ll need to head to X: 375, Y: 230. There’s a basement laboratory with some enemies to slaughter, once you’ve made everything dead, the paladin will have the helmet on his corpse. Then boom, you’ve gotten the set.
Why is this armor so good for what we’re trying to achieve in an explosion build? Great question, glad you asked. Poison and Geomancy in general are one key element to making things explode, and this set is disgustingly powerful in general. Combining it with a fire component is how we achieve best results.
What we gain, additive wise:

- A huge boost to poison resist, if we’re not rolling undead, letting us be a lizard
- Total immunity to knock-down and teleport
- A statistic boost to all the damage dealing stats that we want
- Upgradable armor that will last the rest of the game
- Free mnemonic talent
- The rooting corruption passive
None of these things are a dramatic must for the build, but if it’s available, and relatively easily obtained and will augment our poison damage to keep up with our fire, then why not!
Step Two – Stats and Talents for Exploding Things in Divinity
As with basically any build whatsoever in this game, you’re going to want to put stats into memory in accordance to where you are in the game, and how many skills are available to you. That goes without say, but I’m going to say it anyway – no memory, no skills, no damage.
After memory we’re going to take the vast majority of stat points and dump them into INT. The higher your intelligence, the more damage your spells are going to do when you get them off. Take WIT as well, because our spells are going to be able to crit with Savage Sortilege and the extra chance and initiative is nice. Consider a two-to-one or three-to-one ratio INT to WIT for best results.

Savage Sortilege: Gives all magical skills a critical chance equal to your critical chance score.
Without this talent, the potential potency of your explosions is pretty much a wet noodle. A wet noodle is the opposite of a cool, giant, badass explosion. As such, we’re going to take the talent and we’re going to dump stat points into wit as mentioned above. Critically hitting with spells is impossible without it, and we want to be getting big crit numbers.
But, don’t think just because you’ve taken SS and you have a few fire spells that the build is complete, we’re going to need a few other key components talent wise to help us on our way to Divinity volcanic perfections.
Talents:
The remainder of your talents should be spent on the following considerations:

Torturer: “With Torturer, certain statuses caused by you are no longer blocked by Magic or Physical Armour, and their duration is extended by one turn. Burning, Poisoned, Bleeding, Necrofire, Acid, Suffocating, Entangled, Death Wish, and Ruptured Tendons are affected by this talent.”
This is pretty much a must on this build. It straight up makes your booming ignore armor. You no longer have to strip down pesky shields in order to set things on fire, or poison them, or both. Should be one of your first considerations, and needs to be given the utmost priority.

Demon: “Gain 15% fire resistance and 15% water weakness. Max fire resistance also increases by 10″
This, combined with starting out as a Lizard character, and the right gear around your contamination set, should see that you have a huge fire resistance, if not over 100% to be healed whilst on fire. That’s the goal, and Demon makes it considerably more possible. Just avoid aqua.

Executioner: “Gain 2 AP after dealing a killing blow (once per turn).”
Simply put, you’re going to be exploding and kill at least SOMETHING each turn. Executioner means that you can follow up after that first huge explosion and take down some additional remaining baddies, or put yourself in a safe position.
Elemental Affinity: “Lowers the Action Point cost of spells by 1 when standing in a surface of the same element.”
You’re setting everything on fire almost immediately, which will basically guarantee that you’re always standing in fire and lapping it up. Boom, now all of your spells are costing one less AP, just for enjoying the toasty environment.
Other Considerations – Nice to have, but not a must:
Far Out Man, Glass Cannon, Hothead, Unstable.
Skill Points:
As far as skill points go, we’re going to need to pump a few points into Geomancer until we have completed the contamination set, as the set will provide the vast majority of Geomancer points that we need for our poison related set up skills. We need two in Scoundrel and two in Warfare for our mobility skills. Elsewise, we’re going fully to dump our points in Pyrokenetic. The more points we dump into pyro, the better our DPS, simple as that.
Step Three – The Fun Part, Abilities
The last piece of the Divinity explosive mage build puzzle is using the skills that you have effectively, and ensuring that you’ve got the right stuff on your hotbar. You can have all the right stats, all the right gear, but if you’re not using it all effectively, then you’re not as explosive as you could be.
Maneuverability:
The first part of a good explosion is positioning. You want to be in the thick of the fight. You want to be around as many enemies as possible before you below up. How do you achieve this, without wasting AP wandering in and triggering attacks of opportunity? Glad you asked, mobility skills! Remember those scoundrel and warfare points we go? Here’s why.
Phoenix Dive – This is our go-to maneuverability skill. Not only does it allow for positioning, but it also sets things on fire where we land. We’re all about blazing it up, and we need to get in the middle of the fight. Phoenix Dive is the way to go.

Cloak and Dagger – This is our back up maneuverability skill. If we’ve dived in, blown up everything close to us, and need to move across the map quickly to blow up things elsewhere BUUUT Phoenix is on cooldown, well that’s why we have a backup. Use Cloak and Dagger to get where you need to go, when you can dive on fire.
Buffs:
Okay, now that’s we’ve slotted ourselves in and amongst the enemies, reading for the priming, let’s talk about what we and our support characters can do to augment our damage with buffs. You don’t need to apply these yourself, and waste the AP. However, with some, you’re going to be forced to cast them youself.
Adrenaline – We’ve already put points in scoundrel to get Cloak and Dagger, and Adrenaline is equally important and makes use of those points invested. Whether using it to finish off a group, or position yourself safely, get off an ability, it’s almost a must in any build.
Peace of Mind – Gives overall stats to the point where the buff is hard to ignore, and you don’t even need to waste the AP casting it on yourself. Get your support character to give you the buff, then go to town with the additional damage and crit chance.
Flaming Tongues – Basically this means that you’re getting off magical attacks of opportunity. It scales with your high int, and triggers often considering you’re always jumping into the thick of the fight. The damage adds up quickly and is a nice little bonus.
Other considerations buff wise should be around surviving once you’ve dished out the hurt, considering things like Chameleon Cloak or Uncanny Evasion to end your turn. I’m not going to list them as key buffs, because the enemy can’t kill you if they’re all dead.
Damage Dealing:
This is where the fun begins. You’ve gotten all the buffs you’re going to get, you’re in the right position, with the right gear, and you’re reading to start blowing things up. We’re going to combine a mix of poison creating skills, with the additive of fire skills to create the reaction between the two.
Contamination – The damage dealt by Contamination is the lowest of the poison inducing skills, but I’ve listed it first as it works in combination the best with your first fire skill that we’ll get into in a moment. The reason that Contamination is the first port of call skill wise is that it has a HUUUUGE area of affect, meaning that you’re applying the poison with Torturer in a huge radius, and it only costs 1AP. It cheaply applies poison in a large area, and is the perfect catalyst ability in this build.
+
Supernova – Now that we’ve applied poison to everything, time to deal damage and make things explode. Supernova is expensive with 3AP, but that’s why we have the scoundrel points netting us adrenaline, and are using the low cost Contamination catalyst skill. Supernova is the highest damage fire skill without using source. It’s area is small, so ensure that you’ve used Phoenix to get into the right position, then explode. This combination can be achieved easily in one turn, which cannot be said for the remainder.
Poison Dart – Creates a puddle of poison at the destination, perfect for setting up explosions. The damage is middle of the range, and higher than Contamination, but obviously the range is much smaller. Use this to set up your explosions, not to apply the poison status in a large area.
+
Laser Ray – This is another strictly damage dealing spell. It’s AoE is larger, but not in a circle like Supernova. So, you’re going to need to line enemies up in order to get this one off. It also comes at a large AP cost at three, to match the damage potential. It’s damage is second to only Supernova for Pyro skills without source.

Poison Wave – This is the highest damage poison related ability in Geo. And it comes at the same price as Poison Dart, but without leaving the puddle. It’s going to apply poison in a fairly big area, and deal moderate damage. But, it’s listed last as the damage compared to what you can do with pyro, isn’t great. Stick to using poison as a utility.
+
Ignition – This is going to be the fire skill for our last combination. I suggest resorting to it after the first two sets. Ignition damage isn’t great, but it has a large area and it only costs 1AP, which means that it can be used in combination with the expensive Poison Wave, it’s just going to be your least damaging combination. It’s good, just the first two are better.
Divinity Fire Mage Build Closing Thoughts
That’s going to wrap up our guide to making an effective fire mage build in Divinity: Original Sin 2. If you have any success with the build, or want to provide feed back, we’d love to hear from you on the mgn.gg blog, the YouTube channel, our new MGN TV Twitter and the new MGN Official Discord.
Credits
| Program | Founding Writers |
| Author | Luke Cowling |
| YouTuber | Fextralife |
| Publisher | MGN |
| Game | Divinity: Original Sin 2 |